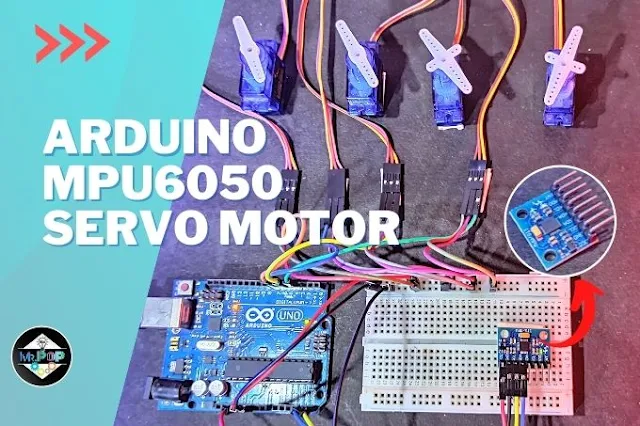
In this aduino project we are going to control servo motors by using MPU6050 Accelerometer sensor. There are four gesture mode like UP, DOWN, LEFT, and RIGHT. We can use this project for build a gesture control car and lots of other projects.
Component requirements:
1. Arduino Uno 2. MPU6050
3. Servo Motor SG90 X 4
4. Breadboard
5. Jumper Wire
Comment down if you getting any problems and also let me know, what next tutorial do you want to see?
Circuit Diagram:
Pin connection:
1. Let's take an Arduino Uno and breadboard for making the connection.
- Connect Arduino 5v pin to breadboard positive side.
- Connect Arduino GND to the breadboard GND side.
2. Now, we have to make a connection with Arduino Uno and the MPU6050 acceleration sensor.
- Connect mpu6050 VCC pin to Arduino 3.3v pin.
- Connect mpu6050 GND pin to breadboard GND side.
- Connect mpu6050 SCL pin to Arduino a5 pin.
- Connect mpu6050 SDA pin to Arduino a4 pin.
3. Now, we have to make a connection with Arduino Uno and servo motor.
| No. of Servo Motors | Arduino Uno pins | VCC | GND |
|---|---|---|---|
| 1. Servo signal pin | 7 | VCC | GND |
| 2. Servo signal pin | 6 | VCC | GND |
| 3. Servo signal pin | 5 | VCC | GND |
| 4. Servo signal pin | 4 | VCC | GND |
4. Now the circuit is completed
5. let's jump to the coding part
6. open Arduino IDE
7. First, we have to install the libraries so, go to tool --> Manage Libraries and then search for these three libraries and install them.
1. Adafruit MPU6050
2. Adafruit unified sensor
3. Adafruit SSD1306
After we installed the library, now copy the code from below and paste it on the sketch.
8. Connect the Arduino Uno to pc via USB cable.
9. Goto tool --> Board --> Arduino AVR board -- Select your Arduino board.
10. Goto tool --> port --> select your port
11. Now everything is completed, so upload the code
12. Goto serial monitor and check the values.
Coding:
#include <Adafruit_MPU6050.h>
#include <Adafruit_Sensor.h>
#include <Wire.h>
#include <Servo.h>

Adafruit_MPU6050 mpu;
int x = 0;
int y = 0;
int z = 0;

Servo servo1;
Servo servo2;
Servo servo3;
Servo servo4;

int value  = 0;

void setup(void) {
  Serial.begin(115200);

  // Try to initialize!
  if (!mpu.begin()) {
    Serial.println("Failed to find MPU6050 chip");
    while (1) {
      delay(10);
    }
  }
  Serial.println("MPU6050 Found!");

  // set accelerometer range to +-8G
  mpu.setAccelerometerRange(MPU6050_RANGE_8_G);

  // set gyro range to +- 500 deg/s
  mpu.setGyroRange(MPU6050_RANGE_500_DEG);

  // set filter bandwidth to 21 Hz
  mpu.setFilterBandwidth(MPU6050_BAND_21_HZ);

  delay(100);
  servo1.attach(7);
  servo2.attach(6);
  servo3.attach(5);
  servo4.attach(4);

  servo1.write(0);
  servo2.write(0);
  servo3.write(0);
  servo4.write(0);
}

void loop() {
  /* Get new sensor events with the readings */
  sensors_event_t a, g, temp;
  mpu.getEvent(&a, &g, &temp);

  x = a.acceleration.x;
  y = a.acceleration.y;
  z = a.acceleration.z;

//Serial.print(x);Serial.print(" ");Serial.println(y);
if (x < 10 && x > 0 && y < 4 && y > -4){
  Serial.println("up");
   value = map(x,  0, 10, 0, 180);
   servo1.write(value);
   Serial.print(value);
  }
else if (x > -10 && x < 0 && y < 4 && y > -4){
  Serial.println("down");
  value = map(x,  -10, 0, 180, 0);
  servo2.write(value);
  Serial.print(value);
  }

if (y < 10 && y > 0 && x < 4 && x > -4){
  Serial.println("Right");
  value = map(y,  0, 10, 0, 180);
  servo3.write(value);
  Serial.print(value);
  }
else if (y > -10 && y < 0  && x < 4 && x > -4){
  Serial.println("left");
  value = map(y,  -10, 0, 180, 0);
  servo4.write(value);
  Serial.print(value);
  }
}
%20(1).webp)


%20(1).webp)
